Dinner Rolls for When You Want to Start from Scratch

“Starting from scratch” is a phrase that often connotes a plan that failed, a misguided project in need of a system reboot.
Something went wrong and you’re taking a mental sweep of the hand across the table to clear it off and do it right this time.
For those of us who cook as stress release, for whom a meal isn’t just a mindless few minutes of satisfaction but a source of therapy, starting from scratch is an exercise in Zen.

Laying your mise en place out on the counter, immersing yourself in the repetition of chopping, measuring, stirring, tasting, assessing–it’s a calming sensation that’s ripe with potential as you shape a dish into being.
And in a week where nearly everything went pear-shaped (such a lovely British term for such an unfortunate turn of events), starting from scratch was the only way to go.
It began with inadvertent self-injury, as in the span of three days I made myself .001 pounds lighter by slicing off part of my thumb on a food processor blade.
Then burnt my arm while roasting 22 pounds of cashews.
Then hit myself square in the forehead with an All-Clad saucepan (yes, it’s possible–don’t try this at home).

Unpleasant, but nothing I couldn’t bandage up and move on. Then the heavy, less-immediately-bandageable stuff came down.
ReadyMade announced it was folding (final issue on stands now, website closure soon) and almost just as heartbreaking, Big Man Clarence Clemons played his final gig.
Needing to regain some equilibrium, I realized it was time to take a cue from what turned out to be my final piece for ReadyMade, published this week.

I wrote a treatise on the easy (yes, easy, I swear!) skill of making pie crust based on a two-day intensive baking seminar at King Arthur Flour in Norwich, Vermont.
At Blog & Bake, a baking boot camp for food writers, 12 of us were put through our paces in bread baking, pie making, and dough stretching by a battery of incredibly talented chefs and instructors.
These women are the real deal. They will instill supreme confidence in anyone who fears the seemingly precise and unforgiving world of baking, and turn all skeptics into raving flour zealots.
I would put a money-back guarantee on it.

For my therapy immersion and wake-up call, I needed something simple, a reminder that no matter what sends me reeling, I can still cook, I can still write, and I can still consume large amounts of yeast- and flour-based food.
With its quick rising time and opportunity to roll lots of squishy dough bits around in my hands–not to mention its sympatico relationship with a pat of butter–a recipe for dinner rolls would do.
PJ Hamel, the visionary behind the master tome The King Arthur Flour Baker’s Companion and one of the smart cookies who writes for the KAF Baking Banter blog, hit the sweet spot with this recipe.

All the usual comforting adjectives apply to these golden orbs: pillowy, soft, fluffy, buttery. These dinner rolls could be the poster child for carbs.
Just a few tweaks made the dinner rolls exactly what I wanted them to be.
I reduced the amount of sugar to end up with a more savory dough, I subbed in buttermilk for regular milk because I just can’t resist, and I didn’t bother filling the rolls with any cheese (what?? I know!).
If you’re willing to shell out a few bucks for King Arthur’s pizza dough flavor, the optional tablespoon I’ve added to the recipe makes a huge difference.
The package says the seasoning is a combination of dried garlic, cheese, and other spices, but I actually think it’s made of magic.

Disclosure: ReadyMade compensated me for attending Blog & Bake, and King Arthur Flour provided lodging and instruction gratis for all attendees.
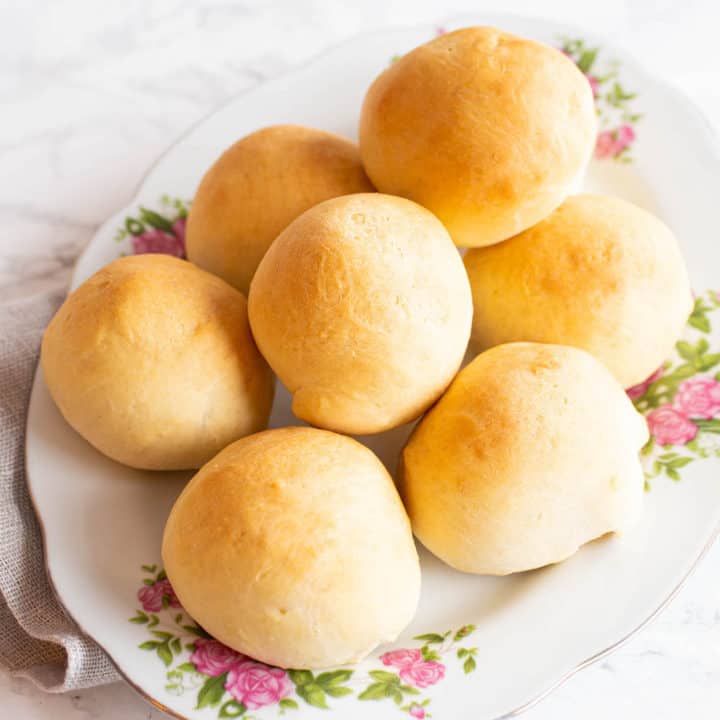
Dinner Rolls
Dinner rolls from scratch are a great introduction to yeast baking and provide warm comfort. Here's an easy-to-follow recipe that's ready in about an hour.
Ingredients
Quick Starter
- 1 1/2 tablespoons instant yeast or 1 tablespoon active dry yeast
- 1/2 cup warm water (like bathwater; no hotter than 105 degrees F)
- 1/2 cup (60 grams) all-purpose flour
Dough
- 4 cups (480 grams) + 1 cup (120 grams) all-purpose flour, divided
- 2 tablespoons granulated sugar
- 1 tablespoon King Arthur Flour pizza dough flavor
- 1 teaspoon Diamond brand kosher salt
- 4 tablespoons (1/2 stick) unsalted butter, softened
- 1 cup buttermilk, at room temperature
- 1 egg, lightly beaten
- baking spray
Instructions
- In a small bowl, mix the Quick Starter ingredients (yeast, warm water, sugar, and flour) until incorporated and allow to rest for 5 minutes.
- While the starter rests, whisk the 4 cups (480 grams) of flour, sugar, pizza dough flavor, and salt together in the bowl of a stand mixer.
- Add the butter, buttermilk, egg, and reserved Quick Starter to the bowl.
- Use the beater attachment to stir the ingredients together on low speed until a shaggy dough forms.
- Switch to the dough hook and knead on low speed for about 5 minutes, adding the remaining 1 cup flour a few tablespoons at a time as needed if the dough becomes too sticky.
- Alternatively, you can knead by hand.
- Working from the final cup of dough you've reserved in the small bowl, lightly flour a countertop or other work surface and turn out the dough. Knead gently, adding flour from the bowl as necessary when the dough and your hands become sticky, for 6-8 minutes or until a soft and elastic dough forms.
- Lightly spritz a large, clean bowl with baking spray and add the dough. Cover and let rise for 20 minutes.
- While the dough rises, line a large baking sheet with parchment paper.
- Once the dough has completed its 20-minute rise, turn the dough back out on the floured work surface and divide into 16 pieces weighing approximately 2 1/2 ounces or 70 grams each. (Remember, a kitchen scale makes everything easier!)
- Roll each piece into a smooth ball, pinching the loose ends together on the bottom of the roll, and place on the lined baking sheet.
- Cover and let rise for 20 more minutes, and preheat the oven to 375 degrees F.
- Bake the rolls for 15-18 minutes or until golden brown.
- Transfer to a rack and eat as soon as they're cool enough to handle.
Notes
Adapted from The King Arthur Flour Baker's Companion
Recommended Products
As an Amazon Associate and member of other affiliate programs, I earn from qualifying purchases.


Nutrition Information:
Yield: 16 Serving Size: 1Amount Per Serving: Calories: 97Total Fat: 4gSaturated Fat: 2gTrans Fat: 0gUnsaturated Fat: 1gCholesterol: 20mgSodium: 196mgCarbohydrates: 13gFiber: 1gSugar: 2gProtein: 3g
The nutritional information above is computer-generated and only an estimate.
FTC Disclosure: As an Amazon Associate, I earn from qualifying purchases. Good Food Stories LLC receives a minuscule commission on all purchases made through Amazon links in our posts.

Casey Barber
Casey Barber is the owner and founder of Good Food Stories LLC and a visual storyteller whose work often focuses on the intersection of food and culture. She is also the author of the cookbooks Pierogi Love: New Takes on an Old-World Comfort Food and Classic Snacks Made from Scratch: 70 Homemade Versions of Your Favorite Brand-Name Treats, and she couldn’t get anything done without the help of her executive assistant cats, Bixby and Lenny. Her favorite color is obviously orange.


