Homemade Candy Corn Oreos

“You smell the candy corn before you see it,” said Max Falkowitz in his Candy Corn Oreo review on Serious Eats. I read that line and a shiver went down my spine.
Don’t throw Cadbury Screme Eggs at me, but I’m not a fan of candy corn.
Like Peeps, I find candy corn to be sugar without substance, a cloyingly sweet treat without any contrasting taste to bring depth and interest to its flavor profile.
(For the uninitiated, the Candy Corn Oreo was a limited edition flavor of the classic Oreo available only at Target for the Halloween season.)

To sully the name and flavor of my beloved Oreo seemed like a Frankensteinian blasphemy, a hybrid creature so foul that I thought the pitchforks should come out immediately.
However, as a certified snack expert, I felt it was my duty to grab a bag in the name of science and get down to business.
I needed to confront these orange-and-yellow Oreos in the flesh and see if I could truly come to terms with making a homemade version.

Like a horror movie monster, once freed from its hermetically sealed tomb, the smell of chemical sweetness snuck up behind me while I worked in the kitchen.
The scent hovered threateningly over my shoulder, breathing down my neck just out of sight until I whipped around to find… nothing there.
The yellow bag sat placidly on its shelf in the pantry, masking the terror within.
All right, all right. I’m verging on hyperbole here, as amusing as the Halloween horror metaphor might be to write.

The limited-edition Oreos, as many have already noted, don’t quite match up to the taste of real candy corn.
They’re more overtly sugary and, yes, artificially flavored than the waxy candy itself, as impossible as that may be to imagine without doing a head-to-head bite-off. But it’s true.
The homemade version I’ve developed below takes the best of both worlds, giving you teeth-rattling sweetness with the honey undertones that so many have detected in candy corn.
They’re just like the real thing, only without that creepy chemical odor.

And best of all, they’re not restricted to a particular store or season. With this recipe, anyone infected with the Candy Corn Oreo craving can make them year-round.
And if I may channel The Most Interesting Man in the World for a moment, I don’t always use food coloring.
But when I do, I use AmeriColor gel paste food coloring for the widest range of vivid color without too much mess.

Remember when you would squeeze out an entire bottle’s worth of the liquid food coloring just to make one batch of red frosting, otherwise you’d be left with something sort of reddish but really carnation pink?
You won’t get that with gel food coloring.
It’s freakish and definitely not found in nature–but then again, neither is candy corn.
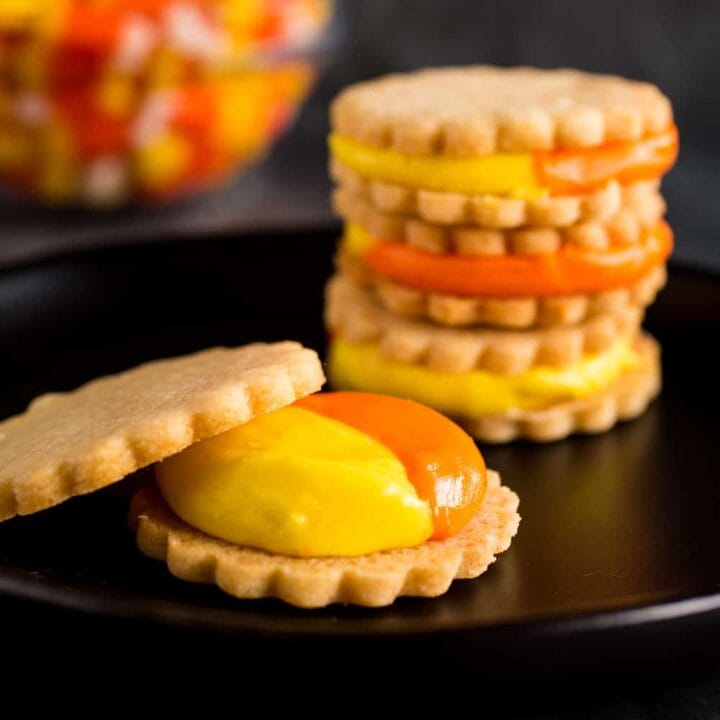
Homemade Candy Corn Oreos
Homemade Candy Corn Oreos taste just like the limited-edition cookie from Halloweens past, only without the chemical smell.
Ingredients
Cookies
- 3 1/2 cups (14 7/8 ounces; 420 grams) unbleached all-purpose flour
- 1 teaspoon baking powder
- 1/2 teaspoon kosher salt
- 8 tablespoons (1 stick) cool unsalted butter, cut into 1/2-inch cubes
- 1/2 cup (3 1/4 ounces; 90 grams) vegetable shortening, at room temperature
- 1 cup (7 ounces; 200 grams) granulated sugar
- 1 large egg
- 2 tablespoons honey
- 1 teaspoon vanilla extract
Filling
- 2 1/2 cups (10 ounces; 280 grams) powdered sugar
- 2 tablespoons light corn syrup or Lyle’s golden syrup
- 1 tablespoon honey
- 1 tablespoon vegetable shortening, at room temperature
- 1 tablespoon vanilla extract
- 1 tablespoon milk
- orange and yellow food coloring
Instructions
Make the cookies:
- Whisk the flour, baking powder, and salt together in a medium mixing bowl and set aside.
- Beat the butter, shortening, and sugar together in the bowl of a stand mixer fitted with the paddle attachment at medium speed for 3-4 minutes until the butter is whipped, fluffy, and pale.
- Reduce the mixer speed to low and add the egg, stirring for 30 seconds until fully incorporated, then the honey and vanilla extract.
- Add the reserved flour incrementally until a soft dough forms.
- Divide the dough into two equal pieces and wrap each tightly in a piece of plastic wrap. Refrigerate the dough for 1 hour.
- Preheat the oven to 350 degrees F and line two baking sheets with parchment paper or silicone liners.
- Liberally flour a clean work surface and rolling pin. Roll one of the dough discs to 1/4-inch thickness and cut out 1 1/2-inch rounds with a cookie or biscuit cutter.
- Transfer the rounds to the prepared baking sheet and repeat with the remaining dough.
- Bake for 8-10 minutes, just until the cookies are no longer shiny on top but barely starting to color around the edges. They will seem underbaked, but the high sugar content of these bad boys means they'll go from golden to burnt before you notice.
- Transfer the cookies to wire cooling racks and cool completely before filling.
Make the filling:
- Stir the powdered sugar, corn syrup, honey, vegetable shortening, vanilla extract, and milk in the bowl of a stand mixer fitted with the paddle attachment on low speed until combined, about 30 seconds. Then beat on medium speed until whipped and firm.
- Divide the filling equally between two mixing bowl. The filling will be a little over 12 ounces, so for those of you with a kitchen scale, you'll have about 6 ounces in each bowl. (Hint: use white bowls to best see the vibrancy of the food coloring.)
- Dribble about 4 drops yellow food coloring into one bowl, and orange food coloring into the second bowl.
- Knead the food coloring into the filling with a sturdy silicone spatula until no streaks remain.
- Roll the filling into balls a little more than 1/2 inch in diameter and place on the underside of a cookie. Place another cookie on top and press gently, shimmying slightly to adhere and squish the balls out into equal halves of filling.


- Repeat with the remaining cookies and filling.
For more visual detail on filling the cookies, watch the chocolate peppermint sandwich cookies video, which uses the same technique.
Notes
Sandwich cookies will last up to a week stored at room temperature in an airtight container.
Recommended Products
As an Amazon Associate and member of other affiliate programs, I earn from qualifying purchases.

Nutrition Information:
Yield: 18 Serving Size: 1Amount Per Serving: Calories: 187Total Fat: 7gSaturated Fat: 4gTrans Fat: 0gUnsaturated Fat: 3gCholesterol: 25mgSodium: 96mgCarbohydrates: 29gFiber: 1gSugar: 8gProtein: 3g
The nutritional information above is computer-generated and only an estimate.
FTC Disclosure: As an Amazon Associate, I earn from qualifying purchases. Good Food Stories LLC receives a minuscule commission on all purchases made through Amazon links in our posts.

Casey Barber
Casey Barber is the owner and founder of Good Food Stories LLC and a visual storyteller whose work often focuses on the intersection of food and culture. She is also the author of the cookbooks Pierogi Love: New Takes on an Old-World Comfort Food and Classic Snacks Made from Scratch: 70 Homemade Versions of Your Favorite Brand-Name Treats, and she couldn’t get anything done without the help of her executive assistant cats, Bixby and Lenny. Her favorite color is obviously orange.


